Using Stuffed Animals in the Classroom

Kids love stuffed animals. I mean, they LOVE them. They are comforting, cute, and make the students happy. Here are three ways you can use them in your classroom.

reading buddies

Reading Buddies

This is my favorite way to use stuffed animals in the classroom. You're probably thinking that reading buddies are supposed to be human. You know, you pair a class of younger students up with a class of older students and every week/every other week they read together. But, did you know that stuffed animals can also serve as reading buddies? 

My second graders have fifth grade reading buddies, but they don't meet up with them every day to read. But, they do have their stuffed animal reading buddies that they can read with every single day (even when their fifth grade buddies visit). 

Keep your stuffed animals in a spot with easy access, like a cart shown below. When it's time for students to silent read/independently read let them choose a reading buddy to read to.  

reading buddies

Here are a few expectations you might want to consider:
  • Use one reading buddy at a time.
  • Read to your stuffed buddy or cuddle it as you read.
  • Do not play with your reading buddy or you will have to put it back.
  • Treat the reading buddy with care (we want them to last).
  • No arguing over who gets which reading buddy, they all need love and cuddles.
In my classroom, if a student decides to play with their reading buddy when they should be reading, they have to put it back, but just for that day. The next day, they are welcome to try again.

Students love reading to the stuffed animals. Honestly most of them usually just cuddle it as they read. I think it's comforting and sometimes, you just need to feel comforted/comfortable. 

Recognizing Students Throughout the Day

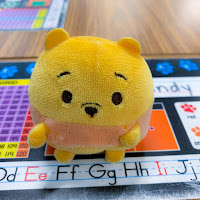
When you see a student making good choices, place a small stuffed animal on their desk. It can stay there all day or it can move from desk to desk throughout the day. I started doing this with my class last year and they loved having mini Pooh and Piglet visit them while they worked. Sometimes, they stayed on a desk for quite some time. Sometimes, they hopped from desk to desk. The students loved having them pop in for a visit and it was a great way to motivate them to make good choices.

stuffed animals in the classroom


Practice

Speaking in front of the class is nerve-wracking for some students, but we do have speaking standards to assess. Students can use the stuffed animals to practice reading their writing aloud, or practice whatever it is that they are tasked with sharing aloud. You could even allow students to bring a stuffed animal with them as they present if they are especially nervous about it.

A Few Tips

Acquiring Stuffed Animals

Most of my stuffed animals came from my daughter's over the top collection. I purchased a few here and there, but I never spent much on them. If you are looking to purchase your stuffed animals, check out Kohl's or Oriental Trading. They usually have lots of affordable options.

Small vs. Large Stuffed Animals

The smaller the animals are, the more you can store. Most of my stuffed animals are Beanie Boos, which are on the smaller side, so I can offer my students a lot of choices. I also have more than enough for each student to use one. There's nothing wrong with larger stuffed animals, just remember they will take up more space and you might not be able to house a class set if that is your goal.

Taking Care of the Stuffed Animals

Wash your stuffed animals, please! Preferably more than once a year. The frequency with which you do so is up to you and your preferences, but keeping them clean is a good idea. I simply throw mine into the washing machine and give them a good spin. After that, I let them air dry.

Stuffed animals are a great way to bring some fun and joy into the classroom. They can be used in so many ways too. 

DON'T FORGET IT, PINT IT!

Stuffed animals in the classroom


Share It:

Classroom Management: Using a WOW Board

Have you heard of the WOW board? This tool is not a brand new idea, but I only started using it last year. And, I intend to keep using it!


Using a WOW board is a great (and super easy) way to recognize individual students and reward their choices, achievements, and efforts. It is also a great way to boost self-esteem too.

What is it?
The board is simply a table that is printed onto poster sized paper. The table is labeled with letters along the bottom, and numbers along the side, creating cells. It is laminated so it can be used again and again.


I printed my board using the standard poster size setting on our poster maker. I know that some schools may not have a poster maker, but there is no rule that says your WOW board has to be poster sized!

How do you use it?
When you see a student making a smart choice, setting a good example, making gains, or whatever you feel should be recognized, they add their name to the board. They can choose any space they want and write their name in the selected space.

Many WOW boards have 100 spaces, but I like for it to fill up quickly, so my board has only 25 spaces. Since I use other means of recognizing students, like reward tags, I didn't want a board with 100 spaces. 

Since the board is laminated, students can use an Expo Vis-a-Vis marker to add their name. This makes it easy to erase and start over when we're ready to do so.

What do you do when the board is full?
When the board is full of students' names, I choose 5 students to receive a "prize." Really, they get to choose a classroom reward coupon. Prize buckets and I don't get along (#clutter). The classroom rewards cost me nothing and the kids love them. You can find all sorts of classroom reward options on TPT. Then, I erase the board and we start filling it up again and the cycle repeats.

How do you choose the winners? 
I usually just pick five random cells and write them on a sticky note, without looking to see whose names are in those cells. For example, I might write down A3, C4, B5, D2, E1. I call out the cell number and identify the name of the student written in that cell. They're a winner!

You could write all your cells (i.e. A1, A2, A3, etc.) on color tiles, small slips of paper, or anything else you can fit into a small bucket. Then, when it is time to choose your winners, you just pull a tile, slip of paper, etc. out of the bucket and match it to the name in that space on your board.

Using a Wow board is just another way to recognize your students and motivate them to do their best. If you'd like to give it a try, you can download my free template

If your school doesn't have a poster maker, don't dismiss the idea of using a WOW board. You could easily print this on regular paper and just use a smaller sized version. The kids will still love it!

DON'T FORGET IT, PIN IT!


Share It:

Classroom Management: Callbacks in the Classroom

Callbacks, also known as attention getters, are nothing new, but they are one of those classroom management strategies that just work. 


What makes callbacks successful is that they are fun. Students love responding to them and you rarely need to repeat yourself. Sometimes, when I call out "class" and wait for the "yes" response, I just get crickets. Truthfully, I think the students get tired of the same callback all the time. Callbacks add some novelty to the day and elicit an enthusiastic response.

How to Use
With callbacks, there is a teacher phrase and a student phrase. The teacher says their phrase (to get students' attention), then the students respond with their phrase to show that they recognize that it's time to pause and listen.

Introduce each callback to your students before using them. Practice it a few times with the students before actually using it to get their attention. 

Have students place their hands on their shoulders and put their eyes on you after they respond to the callback. Otherwise, they may very likely keep on doing what they were doing once you have initiated the callback. The idea is, you want their attention so you can share information or signal the next activity, so having them freeze in place with their hands away from objects and materials is a good way to do this.

Make sure you have everyone's attention before launching into your announcement or explanation. One simple way to do this is to just stand there and wait. Silently (a few seconds is all it takes). That silent teacher pause is pretty effective at getting students to realize that something is going on. Once you have everyone's attention, start talking.

Stick with callbacks that work for you and your students. Some may just flow better for you, stick with what makes you feel most comfortable. 

Switch up your callbacks. You can change them daily, weekly, or monthly. It's up to you! 

Post your current callback on your whiteboard. This way, students can see it, read it, and never forget it. 

Where can I find callbacks?
If you search callbacks on Google, you will find a ton of options! Here are a few:

T: Hocus pocus!
S: Everybody focus!

T: Peanut butter
S: Jelly time!

T: May the force...
S: Be with you!

T: To infinity...
S: and beyond!

If you liked that last one, then, you are in luck! I created a set of FREE callbacks that are all Disney movie themed. Simply, print, laminate, cut and use! You can post them on your board as you use them, or you can add them to a ring. It's up to you!


Click HERE for your freebie. I hope they make it fun and easy to get your students' attention!

Looking for more classroom management related posts?

DON'T FORGET IT, PIN IT


Share It:

Summer Reading Picks 2023


Do you have a favorite summertime activity? Mine is reading. I mean, pool days, lake days, these are nice and all, but I genuinely look forward to all the reading I get done in the summer. If you're a fan of reading and need some book recommendations, then keep on reading!


This post contains affiliate links for your shopping convenience. I earn a small commission each time someone makes a purchase through one of my links. For more information about my Disclosure Policy, please visit this link.

First, let me just say this...you don't have to read these books during the summer. In fact, a few of my recommendations are kind of fall specific. These picks will get you through the summer and beyond!

I do most of my reading on my Kindle these days, but I still buy books and check them out from the library. There's just something wonderful about holding an actual book. All of the books mentioned in this post can be downloaded to a Kindle, or purchased in paperback/hardback. And, don't forget to see if your public library has any of these titles!

Let's start off with my most favorite closed door "rom com" series, the Paradise Bay series. I've read all six books, and I hope the author comes out with more. They are fantastic! Each book features different main characters. So, they can be read out of order without causing any sort of confusion. Each meet cute story takes place on the same tropical island. Meet cute stories and the tropics? Yes, please!


Book 3: The Suite Life
Book 6: Beach Please

Sticking with closed door rom coms, I'd say the Sheet Cake Sweet Rom Com series is another great one. So far, there are three books (book four is on the way). The series features familiar characters. And, each book features two of the familiar characters and their story. Sheet Cake, by the way, is a reference to the name of the (most likely made-up) town in Texas where the stories take place. 


Apparently, I'm into series these days. I read the Spark House series last week. It was really good. Each story features one of the Spark sisters as the main character. They own an event hotel and are very close to one another. Their stories, of course, involve finding love and navigating the obstacles that come with that. I didn't read the series in order because when I read the first one, I happened to find it at the library and just jumped right in. With that said, each story is a stand alone story and you do not need to read them in order. 


These next two books were soooooo good. I read them last fall, because, well pumpkin and maple sugar...but you could read them anytime. The series is called Autumnboro Sweet Romance (closed door rom coms). Pumpkin Everything was made into a Hallmark movie! Once again, even though it's a series, you could read the stories in any order. 


Next up, some fun cozy mysteries! I read two books in the Beachfront Bakery series. I plan to read more, but I can only read so many mysteries in a row. Hehe. I love the setting of these books, and it is fun to see the main character, who is a baker, unfold the mystery at hand. The nice thing about cozy mysteries is that they are very tame. No scary scenes. In other words, you won't be having any nightmares. ;)


I also read two books in the Bonnie and Clyde cozy mystery series. Bonnie is the main character and Clyde is her cat. One again, you get the thrill of a mystery, minus the yucky, scary stuff. Bonnie is a seamstress/business owner who is recently single and moved back home. Oh, and in her spare time, she solves mysteries. Haha!


Honestly, there are MORE books I could share, but this post would never end. Be sure to visit my reading picks page on Amazon for a complete list of all my favorite books. CLICK HERE to check it out!

If you have a great book you'd like to share, drop it in the comments below!


Share It:

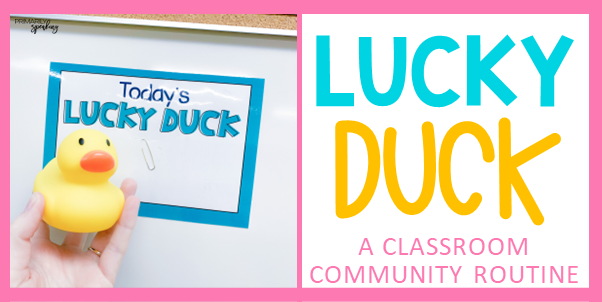
Lucky Duck {A Classroom Community Routine}

Teachers spend a great deal of time building classroom community at the beginning of the school year, but really, this is something that should go on throughout the year. I'm so excited to share with you a tried and true favorite community building activity of mine: Lucky Duck.


I have used this routine in my classroom for many, many years. It dates all the way back to my student teaching days (almost two decades ago).

I'm going to break down how "Lucky Duck" works in my room, but please know that it can be modified and used in a million different ways. So, feel free to tweak and customize these ideas to meet your needs and teaching style.

What is Lucky Duck?
Lucky Duck is basically the student of the day. Each day a new student gets to identify as the Lucky Duck. When you're 7, it's a pretty big deal.

How does it work?
Each day, after school, I select a new Lucky Duck. I have a small tray with my students' names printed on them. I rotate through the stack of names and place the daily name up on the board using the sign pictured below. Doing this right after school means that it's all set up for the morning (when there are always a million and one distractions).


These are the names in their little container. You can easily cut up index cards or cardstock to write students' names. You can grab my sign here for FREE (you'll need to handwrite your students' names). Rotating through the stack of names means that each student gets the chance to be Lucky Duck several times throughout the school year. 


Tip: Don't want to mess with a sign and name cards? Then, just write it all on your whiteboard. Same effect and the kids will still love it!

Once I identify the Lucky Duck, I place a rubber ducky on the student's desk. When the kids walk into the room in the morning, they can see who the Lucky Duck is by either reading the board or looking for the rubber duck.


What does the Lucky Duck get to do?
What I'm about to share is what makes this such a big deal to my students.

Daily News
First, they get to share some Daily News. Usually, I ask the students a question and they have to answer by restating the question. You can grab a similar set of questions here (freebie).


I write their statement on a piece of 12x18 construction paper using the this format: ______ said, "_________." I don't rely on the question cards 100% of the time. I often times invite the students share any random thought they'd like. This love this.


Daily News is so great for learning how to write the date (long and short) and how quotation marks work. It's also great for talking about parts of speech, capitalization, phonics, or whatever your teacher heart is drawn to in the moment. I frequently ask students to identify compound words, words with a specific number of syllables, words that rhyme with ___, to identify nouns or verbs or adjectives, we discuss capitalization and commas in a series, and so on.

Daily Cheer
Second, the Lucky Duck gets to pick the cheer of the day. I have a collection of Dr. Jean chant/cheer cards. They choose one from the designated box and we use it throughout the day. Sorry, no pic but if you search Dr. Jean chants on TPT you can find some great freebies!

Calendar
Third, they help lead calendar. Again, no pic. I really have got to get better about snapping pics in my room! Anyhoo, we use a digital calendar which can be manipulated using a special pen for the whiteboard (I do not have a smartboard, it's just some pen that connects to my projector/computer and has some sort of magical powers I do not fully understand). 

The Lucky Duck leads us through the calendar slides and calls on people to share answers. They also get to prompt them to show their whiteboards. In my classroom, we use the signal, "3-2-1 show!" when using whiteboards. I never thought that being able to say those words would be such a hit, but they are. Haha!

Daily News Part 2
Fourth, the Lucky Duck gets to decorate/illustrate their Daily News. They can do so in their free time, or during reading group time that day (if their group isn't meeting with me).


At the end of the month, I put all the Daily News pages together into a special book and add the books to our classroom library. They absolutely love reading the Daily News books over and over again. They enjoy seeing their own pages, and delight in reading about their classmates. This allows them to learn more about each other and find commonalities.

As you can see, the book doesn't look special, but I'm telling you, they are always the most popular books in the classroom library. The cover is simply two pieces of colored 12x18 construction paper with the simple title written in Sharpie. I have started laminating the covers due to the popularity of the books.


Line Leader
Finally, the Lucky Duck gets to be the line leader for the day. Enough said, we all know that's like the BEST classroom job/privilege in the whole wide world.

This routine is a beloved one. The students absolutely love being Lucky Duck. They all get their moment to shine (several times throughout the year), and they get to know more about one another through Daily News. When we sit on the carpet to hear what the Lucky Duck has to report, the students are at full attention. It's an easy way to help students feel special while fostering community in the classroom.

The only cost involved with this routine is the one time cost of a rubber duck. Mine cost like $3 on Amazon. Can't beat that!

I hope you enjoyed reading about this special routine. Please share your favorite ways to build community throughout the school year in the comments below.

DON'T FORGET IT, PIN IT!


Share It:

Wooden Snowman Ornaments {Updated Tutorial}

Do you let your students make gifts for their families? This is something that I truly enjoy doing. My students enjoy it too! 


This post contains affiliate links for your shopping convenience. I earn a small commission each time someone makes a purchase through one of my links. For more information about my Disclosure Policy, please visit this link.

Several years back, I made a wood slice snowman ornament with my class. It was a hit and I've made this same ornament ever since. This year, I am making the same ornament, only this time, I will be using a different kind of wood.

These precut wooden ornaments are absolutely darling, and perfect for this project. Best of all, they come in bulk and now I have enough ornaments for the next several years! But, I'm getting ahead of myself. Keep reading for ALL the details. :)


What You'll Need
  • wooden ornaments
  • blue acrylic paint
  • silver acrylic paint
  • white acrylic paint
  • black paint markers or Sharpies (at least two)
  • orange paint markers or Sharpies (at least two)
  • q-tips
  • Mod Podge


You can find the precut ornaments on Amazon. The set includes 120 ornaments for an amazing price!


If you like the idea of sealing your students artwork, then a coat (or two) of Mod Podge is necessary. You can find this at any craft store, Walmart, and Amazon


Here's What You Need to Do


Step 1
Paint the ornaments blue and silver (see pic below in step 2). I've found it to be a huge time saver with this project when I paint the ornament ahead of time. Also, acrylic paint does not wash out of clothing, so it's probably best that you do the bulk of the painting.

Step 2
Pull two students at a time and get crafty! To create the snowman, paint your students' thumbs. They will make three thumbprints stacked on top of one another to create a snowman body. 

I have my students turn their thumb so that they are making "sideways thumbprints." I also add more white paint to their thumb in between each thumbprint. Let these dry overnight before adding details.

Keep some baby wipes nearby so they can immediately wipe their thumbs clean.


Step 3
Once again, pull two students at a time to add details to the ornaments. Use paint markers or Sharpies (or a combo of both) to create the details. 

Have students use the black marker to draw a hat, two eyes, a mouth, three buttons, and two arms. Then, have them add a carrot nose with the orange marker. 


I like to pull the kids a few at a time because it is something that can easily take place while the rest of the class is working independently on a task. I don't have to set aside a designated time to create the ornaments because I pull them over in twos. This also allows me to explain the task, show a sample, and closely monitor them since paint is involved.

Step 4
Next, use a q-tip to add snowflakes. Simply dip the q-tip in white acrylic paint and make dots around the snowman.


Step 5
Finally, seal the ornament with Mod Podge. Again, this is optional, but it does add a protective layer, and Mod Podge does a great job of making things look more vibrant. 


Step 6
You'll need to tie a piece of twine so that the ornament can hang. If you think your students can handle this independently, have them do it, otherwise, I suggest saving your sanity and just do it yourself.


Now the ornament is ready to send home! I like to package mine up in little kraft bags. I let the kids make a label to attach (sometimes I just use labels from the gift wrapping section at Target). I like these bags from Amazon. I also use them for my birthday bags. 


I hope you are able to use this idea! It's sure to become a keepsake with your students' families. :)

DON'T FORGET IT, PIN IT!


Share It:

Meet the Teacher Tips & Ideas

Does your school host a Meet the Teacher event? I know this looks different in different places. We usually report back to school three days before the first day of school. The Meet the Teacher event is always on that third day, so it's important that I get in my room and have a plan so that I'm ready to meet my new students and their families at the end of the week.

This event is an opportunity to leave a lasting impression and meet your students (and their families). My hope is that the following tips will make this less overwhelming for you. I hope you find them useful! 


Tip 1: Don't Stress
Honestly, this event is intended to give you the opportunity to meet your students and vice versa. Don't overthink it.

Tip 2: Tidy Up
Your classroom does not need to be completely set up at this time. Get the furniture in place, organize whatever you can, and make sure things look clean. This not only creates a less hectic physical environment, but it gives a good impression, a first impression. The families will see your room and make judgements about it before they even speak to you. You want to present a cozy and inviting space, not a crazy, messy one.

Tip 3: Create some ambience
Two things you will always see/smell in my classroom are calming music playing in the background (You Tube has tons of options) and the smell of peppermint oil diffusing in the air. I don't reserve these strictly for day to day classroom use, I start using them at the Meet and Greet. People always comment on the nice smell and while they might not comment on the music, I know it helps set a relaxing tone for the day.

Tip 4: Greet Everyone
It's a good idea to greet each family that enters your room and an even better idea to engage in conversation with them. This is just good manners and obviously sets a good impression. Sometimes more than one family walks through the door at a time, or you might be in conversation with a family as a new one enters the room. Acknowledging them with a smile and a small wave before you can speak with them is a great way to let them know they aren't being ignored.

Tip 5: Protect Your Stuff
When families come to meet you, there are often times younger siblings in attendance. In my experience, these littles are often allowed to just roam the room. So, it might be a good idea to put away any items you don't want little hands getting into. Or, I've even seen some teachers set up a designated kid area with things like toys and coloring pages. 

Tip 6: Be Prepared to Collect Supplies
There are always a few kiddos who bring their supplies to the Meet the Teacher event. I personally love this because when I have to go through all of it on day one, it's overwhelming. Some schools even encourage families to bring supplies to this event. Either way, be sure to have a space set aside for this. You might even consider having labeled buckets where students can drop supplies. There is no right/wrong way to collect supplies because how those supplies are used varies from classroom to classroom, just be sure you're prepared to collect them.

Tip 7: Set Out a Meet the Teacher Letter & Forms
First, make sure you have your desks set up. If they're all shoved in a corner, that is not very inviting. 

Then, place important items on your students' desks. I set out a few forms for parents to fill out. This allows me to get some insider information from the parents' perspective before the first day of school.


I always share a Meet the Teacher Letter with my students and their families at this time. It's a quick snapshot that allows them to get to know some personal information about me. This is important. I am a person, and sometimes, people need to be reminded that teachers are people too. Psst: I left out my contact info and personal bio in this sample, just trying to keep some things a bit private over here on the Internet. Hehe.


Depending upon how this event works at your school, you might want to share a Meet the Teacher slideshow with your families, or project it on your whiteboard and let it loop through for parents to look at as they check out your room. I usually do a combo Meet the Teacher slideshow/BTS presentation with important school info because that's how my school has us do things. 


Bonus tip: I share a stand alone Meet the Teacher slideshow with my students on the first day and also print a Meet the Teacher book which I add to my classroom library. The kids love reading the book. On repeat.


Tip 8: Leave a Small Gift for Students
This is not necessary. It is something I like to do, and I keep it very simple. Along with the letter and forms noted above, I place a small gift of one or two glow stick bracelets on the desk. It's just a small something to let the kids know I'm excited they're a part of my class. You can read more about this idea by clicking HERE.


Tip 9: Share Your Wishlist 
Please only do this if it is appropriate for your school population. At my previous school, it was common for teachers to set up a small space to display a list of items they were in need of. I don't do this at my current school, but if it is something you know your population would be receptive to, go for it! My favorite way to display this was on the whiteboard. I used our die cut machine to cut out a tree trunk/branches and some apples. I wrote what I needed on the apples and attached them to the tree trunk. Parents took an apple if they wanted to purchase that item for our classroom.

I sure hope a few of these tips were helpful today. Got a few tips of your own? Leave them in the comments below!

DON'T FORGET IT, PIN IT!


Share It: