Polka Dots and Zebra Stripes {Monday Made It}

I'm linking up with Tara from 4th Grade Frolics to share some craftiness with you.  So, let me share with you what I've made this past week!

First, I made a new welcome sign.  I love it!!


I also made some new headers for my objectives.  I place these on  my board in sections marked off with black electric tape, and then I simply write the objective for each subject in the morning before school starts.  


Lastly, I made this birthday display.  Last year I didn't display them, and I kind of felt bad about that.  My friend had a similar display last year and I thought  it was great because it really doesn't take up that much space. 


These projects came from my final Monday Made It, my new decor pack, Polka Dots and Zebra Stripes: Classroom Decor Set.  There's a lot more stuff in the pack than I have shown in this post. Click the image to see this pack on TpT.


Toodles!


Share It:

Writing in Style {Tutorial}

Follow my blog with Bloglovin

This week my friend and I got together and made these writing notebooks for our students.


Cute, right?  She said she stumbled upon the idea online somewhere.  If I knew the original source, I would share it with you.  If you know the original source, please let me know and I will give credit where credit is due!!

These notebooks were definitely a quick project, it didn't cost much, and now our students will be writing with the most fashionable notebooks around!

For this project you will need:
  • spiral notebooks (thankfully, our school supplies these, so we didn't have to buy them)
  • scrapbook paper (I just used some extra pages that I already had on hand)
  • spray adhesive (my new best friend)
  • ribbon (we got several cute prints from the $1 bin at Michael's)
  • paper trimmer (or scissors and a ruler if you don't have one)
  • newspaper/old tablecloth/something to cover and protect your counter or table
  • hot glue gun
  • scissors
The first thing we did was lay out an old (ugly) tablecloth to protect my countertop from overspray.

Next, we cut the scrapbook paper to size.  Each page was trimmed to 7 1/8 inches by 10 1/2 inches, but notebooks can be different, so be sure to measure yours first.


Then, we sprayed the covers of the notebooks with the spray adhesive (the greatest craft invention EVER).  We sprayed 2-3 at a time.  Once the cover was sprayed, we placed the cut paper on the notebook cover.  It stuck in place immediately and there were no wrinkles or creases (like you usually get with glue sticks).


Once we finished covering all the notebooks, we then glued some bookmarks to the back page. Obviously, this does not have to be done, but we thought it would make it easier for the kids to easily find their spot as they open their book each day.

To do this, we cut several lengths of ribbon (approximately 14 inches long; we really just eyeballed it).  We hot glued the ribbon to the inside of the back cover and then flipped it over to the front page (like those ribbon bookmarks in journals, or the Bible).


We are going to let our students choose their books and give them a blank address label to attach to the front for writing their name.

One last note, initially I did not want to use these notebooks as my students had a hard time using them last year (the pages are a bit daunting for a new second grader).  But, then, a colleague gave me a super duper great tip at the training we attended last week.  During the first trimester, I will task the kids with writing to the second hole.  During the second trimester, they will be tasked with writing between the second and third hole, and during the final trimester, they will be tasked with writing to the bottom of the page.  And, most likely they will be taught to skip lines (at first, anyway).

I hope this how-to inspired you to make some fun writing notebooks for your kiddos!

Toodles!!


Share It:

A Bad Case of Stripes {Freebie}


This week it's all about review, review, review.  So, I decided to review cause and effect with my kiddos.  Every time I review this skill with them, I am so impressed that they remember what a cause is, and what an effect is.  They are a bunch of smarties!

I hadn't yet used A Bad Case of Stripes to cover this skill, so I decided this week would be perfect for it!  (Click the image to see this item on Amazon).


There are so many different cause-effect relationships in this story, so what I did this time around was read the story aloud, stopping at different parts to discuss cause and effect.  First, I had the students use think/pair/share, then I let volunteers share their answers.

When we finished reading the story, the students made these flap books.


Printed on each flap of the book was a cause from the story (ones I purposely did not discuss during the read aloud).  The students lifted the flap and wrote the effect.  I also had them illustrate each effect on the backside of each flap, next to their description of the effect.  Finally, they colored the front side of each flap.


After we made the flap books, I had the students write their own who, what, when, where, why, and how questions about the story.  We've been working on this lately and the kids really enjoy it.  Since we were pressed for time, I had them write three questions.


Then, I had them cut out their three questions and play Quiz Me (my version of Kagan's Quiz-Quiz-Trade, minus the trade part).  Basically, I gave them 6 minutes to mingle about the room and quiz their classmates. They love these kinds of activities!!

Now, if you've made it this far, you deserve a little something!

Here are the templates I used for this review lesson.  To grab a {FREE} copy for yourself, simply click one of the images below to download them from Google Docs.


Enjoy!!

Share It:

Let's Have a Lemonade Tasting (A Fun End of Year Experience)

Today we had a Lemonade Tasting, and it was so much fun!  I typically do several themed days at the end of the year.  We've run out of curriculum, the kids are in summer mode, and it's an easy way to keep them engaged with meaningful learning up until the end.  So, what goes into a lemonade tasting?  Let's find out!


As the students walked in to the room today, they were greeted with these pink and yellow ribbon streamers.  To attach them to the door frame, I simply taped them with Scotch tape.  Nothing fancy, I promise.  Then, I taped a few lemon slice cut outs to the ends of a few pieces of the ribbon.  You can grab the lemon cut outs HERE.


We started the day by making new words from the words "cold lemonade."  Some really great words they came up with include "noodle," "candle," and "melon."  


This got them ready for the next thing: the lemonade tasting!

We headed outside to our courtyard where I served the students small portions of pink and yellow lemonade.  Small, as in, those are bathroom sized cups.  ;) 


To add a bit of novelty to this experience, I made drink tickets for the students to cash in when they grabbed their lemonade.  This actually helped make sure the process remained orderly.  As a student approached the table, he/she dropped his/her ticket in the provided bucket and then grabbed the matching drink.  They loved their little tickets!


After the tasting, we came inside and conducted a whole group poll to find out which flavor of lemonade was most popular.  The students graphed the results and then answered some questions about their graph.


I gave each student a wristband (card stock cut into strips and labeled "Team Pink" and "Team Yellow") to represent their favorite drink. This helped them to be consistent during the poll.  Second graders sometimes forget their choice when participating in activities like this. Hehe.  Plus, they thought it was pretty cool to sport their paper bracelet for the day.


You can grab the drink tickets and bracelet templates HERE.

After graphing our favorite picks, the students brainstormed words to describe their favorite lemonade and then wrote opinion pieces about which lemonade they liked best.  The opinion pieces were written in these super fun shape books. 


After all that sitting and writing, it was time to get up and move a bit!  We played a game of  I Spy.  We used these lemonade themed money word problem task cards to review our problem solving (and money counting) skills. 


Finally, we practiced our parts of speech skills by completing this lemonade themed word sort.  Some of the words really got them thinking and it was fun to hear them talk it out with their teaching buddies.  The question of the day was whether they should put "drink" in the noun or verb category.  It was so great to hear them think it out.  Ultimately, they decided it went with the verbs so that each category would have an equal number of words.  So logical!   (But, for the record, I would have accepted its placement in either category).


Our Lemonade Tasting was lots of fun!  The kids absolutely loved it!  Best of all, they were engaged in all of the activities and didn't even realize that they were still learning!

All of these activities, plus more can be found in my Let's Have a Lemonade Tasting! pack on TPT. 

What are your favorite end of year themes?

DON'T FORGET IT, PIN IT!


Share It:

Five in a Row: A Game for Practicing Addition Facts and What's the Problem? Freebies {May}

Hey everyone!  I'm so excited to be sharing the newest monthly Five in a Row game board with you today. 

What is Five in a Row?
Five in a Row is fun and engaging game where students practice their basic addition math facts.  Students will roll two number cubes (labeled 5-10) or two dice, add them together, and cover the sum on the game board.  The object of the game is to be the first person to cover five numbers in a row.

http://primarily-speaking.blogspot.com/p/freebies.html
Materials
  • Game boards
  • Game pieces (double sided counters, dimes and pennies, different colored linking cubes, and so on) NOTE: since the two players share the same game board, they need different game pieces to denote which spaces they've claimed as their own
  • 2 Number Cubes (blank cubes numbered 5 through 10) OR 2 dice (depending upon the level of play)
How to Play
  • Students play in pairs. 
  • Student A rolls the two number cubes (or dice), adds the numbers together, and covers that number on the board.
  • Student B does the same.
  • Play continues back and forth in this fashion.
  • The first player to get five counters in a row is the winner!
Note:  If a player rolls their number cubes or dice, but the sum is not available, then they do nothing (and hope they have better luck when their next turn comes around).

You can grab this Five in a Row game board for free!  It includes color and black and white versions, as well as two levels of play:
  • Sums of 2 through 12 (played with two dice)
  • Sums of 10 through 20  (played with two number cubes numbered 5-10)

You can grab this game board for FREE! Just click here.  

Wait, there's more!  This post also includes the newest installment of my "What's the Problem?" mini book series.

What's the Problem?
Looking to challenge your students in the word problem department?  Then, you've come to the right place.  The newest installment of "What's the Problem?" is ready to share.  This (free) mini book series is a great way to give students practice with writing their own addition and subtraction word problems. 

So what is a "What's the Problem?" mini book?  It's a project that tasks students with creating a story (word)  problem for a given answer.  They have to use a different kind of thinking to do this, and they have to use the correct vocabulary terms as they write their problems (i.e. "how many more?" or "how many in all?" and so on).


When working on this skill, my students are taught to write three sentences.  The first two sentences pose the problem, and the third asks the question. I also tell my students that they need to use the answer label throughout their story.  For example:

Kylie surfed 2 gnarly waves in the morning.  Then, she surfed 1 more gnarly wave after lunch.  How many gnarly waves did Kylie surf in all?


"What's the Problem?" is a great way to get students thinking about word problems from a different angle and encourages them to use their math vocabulary. They have to focus carefully on crafting their word problem and as they develop this skill, they will also be able to more easily solve other word problems.

When your students are ready, they could write two step story problems. Or, you could task them with adding "extra" information to their word problems as a device to try and "trick" the reader.  You could also have students draw a model for their word problem in the space at the bottom of each page.

You can grab this free mini book here.

Enjoy your freebies!

Share It:

Bringing the Pictograph to Life

I was going to wait until Thursday to share this idea with you, but I decided to go for it anyway!

This week we started graphing in enVision Math.  There isn't really anything bad about this topic; it does a decent job of covering this skill/standard.  However, it isn't very much fun to just sit there and fill out bar graph after bar graph (or pictograph for that matter).  So, I decided to make today's lesson a bit more hands-on and engaging. 

After I introduced the concept of the pictograph, we worked together to make this:


This pictograph served as a replacement to the front page of our daily handout. If you aren't familiar with the enVision series, there is always an exercise on the front of the daily handout (that is, typically, minimally hands-on) that the students generally complete with a partner, once you have presented a new concept.

After we made this graph together, we then completed the remainder of the lesson handout. I think it helped break up the monotony of the handout a bit.


The kids loved the activity.  They especially loved gluing that little guy on the graph as they crossed their fingers that their flavor would "win." 

As you can tell, I simply made the graph out of butcher paper.  I printed out small images of a little kid (thank you Melonheadz) and gave one to each student.  They colored in their little guy and glued him to the graph.  We also used the graph to read the data and review key terms such as "title," "categories," and "symbol."  I'm planning to keep our class graph up throughout the remainder of the unit.

On another note, I've been getting myself ready for next year.  Yes, next year.  I always start getting ready for the following year once mid-April rolls around.  I've been working on my classroom theme as well as making copies that I know I will need (first week materials, daily math fact review, spelling, etc).  It makes for a much less stressful return in August when we report back.

I'm waiting for my binding combs to arrive so I can bind those All About Me Books.  I'm waiting, Amazon....

Check back in a few days as I'm planning to share another graphing activity.  Toodles!

Share It:

The Tea Party Strategy {Student Engagement}

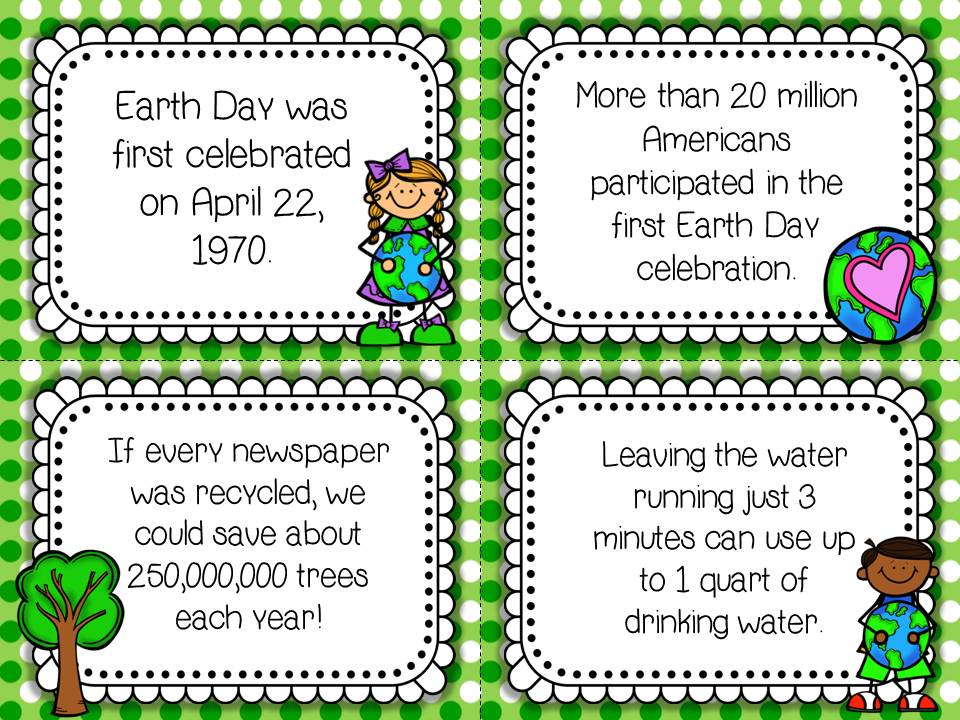
As you well know by now, I am a big fan of using activities that engage and/or hook my students.  Scoot, Find Your Partner, and I Spy are just a few of my favorites.  But, back in my student teaching days, my mentor teacher shared the idea of a "Tea Party" with me.

Don't worry, there isn't any tea involved.  And, it isn't really even much of a party.  Ha!

What is a Tea Party, you ask?  It's essentially a mingle.  Kind of like Find Your Partner, but this time, you can interact with anyone you encounter. 


In any event, this is how it plays out in the classroom:
  • Print, laminate, and cut out the information cards.
  • Give each student a card.
  • Set a time limit (2-4 minutes) and task students with reading their fact to as many classmates as they can in the allotted time.
  • Regroup and review the facts that the students learned.
I love this engagement strategy because it gets the kids moving, they enjoy it, and they are exposed to lots of great information and new vocabulary.

I like to "host" my tea parties at the start of a unit, as unit opener.  This allows the students to get some background knowledge, and it also allows for some good discussion.  Of course, one could host a tea party whenever they'd like!

Click the image below to grab a free copy of the newly updated tea party from Google Docs.  Enjoy!


Toodles!

Share It: