My Favorite Gingerbread Books

I am a sucker for The Gingerbread Man.  Really, I am.  I love this story and all the different versions out there.  Not only is it a fun story, but it is perfect for working on things like retelling, comparing and contrasting, character analysis, and more!

December is my favorite time to share this favorite with my students.  Of course, I have several favorite versions on this story.  I tend to vary the ones I use from year to year, but I love having options. 
Gingerbread Books for the Primary Classroom
This post contains affiliate links for your shopping convenience.  I earn a small commission each time someone makes a purchase through one of my links.  For more information about my Disclosure Policy, please visit this link.

Let's start with the traditional versions of the story.  I love these three. When kicking off my Gingerbread Man unit, I always read one of these first.


The Gingerbread Man (yellow cover)
The Gingerbread Boy
The Gingerbread Man (brown cover)

Each of these is a fairly standard version of the story.  I like to use these traditional versions to practice our retelling skills.  Focusing on the book in this manner helps the students to really think about the story, which prepares them to do some compare and contrast when we read different versions like the ones shown below.


The Gingerbread Girl
In this version, the starring role goes to a gingerbread girl.  She is quick and sassy, just like her brother who was eaten before her. She gets chased by several different characters, but she gets away from every single one of them.  As the story progresses, we learn that she is much smarter than her brother because she is able to outsmart that tricky fox!

The Gingerbread Bear
I seriously love this story.  The cookie in this story is a bear who makes his way through Woodlands National Park. The bear is quick and gets away from several characters including some campers, a squirrel, and a wolf who chase after him, but eventually, he goes up against a park ranger....and loses.

The Ninjabread Man
In this story, a sensei bakes a special ninjabread treat (a gingerbread ninja).  The Ninjabread Man comes to life and tells the sensei that it is time that his students put their skills to the test by trying to catch him.  Then, he runs away.  After sensei signals the gong, his students approach the Ninjabread Man one by one.  The little cookie escapes every time, until (you've probably guessed it), he meets the fox, who outsmarts him.   The book also includes a small glossary and a recipe for ninjabread cookies.

The Gingerbread Pirates
This story is so fun, but also completely different than the traditional story.  You won't find any chases in this book.  A boy and his mom make a crew of gingerbread pirates.  The gingerbread pirate captain (with a toothpick peg leg) goes in search of his pirate crew to rescue them from the scary "cannibal" known as Santa Claus who is known for eating cookies just like them.When they meet Santa, he swears he won't eat them. It's full of fun and adventure.

It's also fun to read a few multicultural versions of the story too!

Multicultural Gingerbread Man Books

The Matzo Ball Boy
This story is a spin off of the traditional gingerbread man story. It is a rather long story, but it's filled with humor.  It includes various Yiddish words, but there is a glossary (and pronunciation guide) in the back of the book to help you explain them to your students.

The Sourdough Man
In this story, a loaf of Alaskan sourdough comes to life.  He is quick and runs away from various animals of the tundra. He encounters a musk ox, a lemming, a hare, a caribou, and more.  None of these animals is a match for the Sourdough Man. Well, until he meets the arctic fox, anyway.  The back of the book gives a bit of history about Alaska's sourdough past and also includes directions for making your own sourdough starter.

I recently added this one to my collection, and I can't wait to share it with my students.

Multicultural Gingerbread Man Books

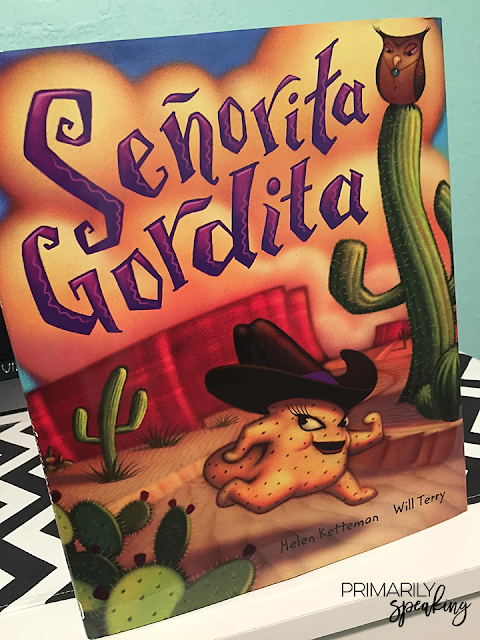
Senorita Gordita
Senorita Gordita is a little runaway corn cake.  She is "zip-zoom-fast" as she runs through the desert. She encounters different desert animals including (but not limited to) a snake, a scorpion, and a lizard, but she gets away from all of them. Sadly, she eventually meets an owl who outsmarts her and gobbles her up.  There are several words in Spanish including the characters' names, but each term is defined in the back of the book.  You can also find a recipe for gorditas in the back of the book.  Yum!

Any version of this story makes it super easy to work on important reading skills such as retelling, comparing and contrasting, and analyzing characters.  It's also easy to incorporate some writing by having students pick a favorite version and explain their reasoning. They could even write their own version of the story, or have them get creative and write about how to catch a gingerbread man. Sometimes, they come up with some pretty clever ideas!

Gingerbread Man Writing Freebie

Want to see how your students would catch a gingerbread man?  Then be sure to grab the free templates shown above by clicking HERE.

Looking for other gingerbread man resources?  Then, be sure to check out my Gingerbread Man unit on TPT.  It was created for use with any version of the story and covers a variety of skills like the ones shown below.  Not only is it educational, but it's fun and engaging. You can check out the complete unit HERE.

Gingerbread Adjectives


DON'T FORGET IT, PIN IT!

Gingerbread Man Picture Book Read Aloud Ideas


Share It:

Reading Group Journals {A Quick & Easy Idea}

During guided reading, I like to have my students record their thoughts, responses, and other notes in a small journal.  It's an effective means of helping them connect to the text and show what they know.

How to Easily Make Reading Group Journals

My go to journal is not complicated or fancy by any means.  It is literally a small stack of paper cut in half and stapled together with a fun cover.  Seriously, the journal is comprised solely of blank copy paper that has been cut in half and stapled together as a mini book with the cover shown below stapled on top.  That's it.

How to Easily Make Reading Group Journals

It's easy to prep and I can use each and every page differently.  I'm not locked into any generic prompts or formatting that might deter from what I want my students to focus on when using their journal.  Instead, that blank page offers endless opportunities to respond in a manner that meets each group's needs.

I usually stack about 10 pages of paper behind each cover.  I have the students use the front and back, so that's 20 pages for responding, which means the journals last a while.  They may be easy to prep, I really don't want to be making new journals every week.  Although, you totally could if you wanted to.  ;)

Each group gets a different color journal cover, to make it a bit easier to group/store them.

So, what do the students write in them?  Anything! That is the beauty of a set up like this.  If you are working on character analysis, have them write a sentence describing a character from the story.


Here's a list of ways you could use a journal like this:
  • Identify the character(s)
  • Describe the character(s)
  • Identify character thoughts/emotions 
  • Identify and describe the setting
  • Identify the problem/solution in the story
  • Retell the story 
  • Make inferences
  • Make predictions
  • Identify the main idea/details
  • Make connections to self/text/world
  • Determine importance
  • Stop and jot (students could respond to your prompt, or jot down any thoughts they have once they are told to stop and jot)
  • Record wonderings and questions
  • Make a glossary of important words (especially perfect for when you're reading nonfiction books)
  • Hunt for and record special words (plural nouns, possessives, words that follow a certain sound/spelling pattern, etc.)
I'm sure I left about 547 things off this list.  You can easily use a journal like this for whatever you want your students to focus on/practice during your guided reading time.  What I love is that each page can be formatted, or set up, however you want since each page is literally a blank slate.  This can be tricky for some students at first, but it's also good practice for them!  They need to learn how to organize information on a piece of paper so that it can be read and understood by others.

Want to give it a try?


Get started by grabbing the free journal cover HERE.  Enjoy!

DON'T FORGET IT, PIN IT!

How to Easily Make Reading Group Journals


Share It:

All About Thanksgiving {Integrating Language Arts & Social Studies}

Do you love Thanksgiving as much as me?  The food, the traditions, the parade, the food, family time, the food.....;)  Of course, these are the things I love about celebrating this holiday, but I also love teaching my students about all things Thanksgiving.

This post contains affiliate links for your shopping convenience.  I earn a small commission each time someone makes a purchase through one of my links.  For more information about my Disclosure Policy, please visit this link.

Honestly, there is so much content surrounding the topic of Thanksgiving that it can be hard to narrow it all down, but I rely on our state standards to narrow my focus.  Our standards tend to lean toward teaching our students about life in earlier times and the reason we celebrate holidays, so that's what I focus on in my instruction.

When I cover the Mayflower Voyage, the Pilgrims/Pilgrim life, and the First Thanksgiving, I integrate this content with language arts (and speaking and listening).  It lends itself perfectly to this subject area.  I cover the content during reading, writing, and social studies time throughout the month of November.  We take notes, discuss topics as we learn about them, write about the content, organize information using graphic organizers, compare and contrast, and more.

Most of my lessons are centered around purposeful read alouds.  More specifically, picture books tend to be the basis of my teaching during this unit. They are written at an appropriate level for my students and the pictures help bring the story of the Pilgrims and Thanksgiving to life.


When I begin my Thanksgiving unit, I like to start by introducing/reviewing who the Pilgrims were.  In second grade, most students are familiar with the Pilgrims, but I always start by reading the first several pages from The First Thanksgiving.  It does a nice job of introducing who the Pilgrims were.


After we read these pages, I like to have my students show what they've learned.  I love the little mini book shown above.  It covers the 5 W's and the students get to practice restating the question.  On the first day, I have them answer the WHO question and decorate the cover.  They are always super excited to make a book!

The following day, I read more pages from The First Thanksgiving.  Then, the students complete the rest of the mini book.  


This introduction to the Pilgrims is a great way to kick off the unit.  Once they know who the Pilgrims are and why they are important, we can move on to other topics that center around this group of individuals.


Once my students are familiar with the Pilgrims, I like to spend some time learning about the Mayflower voyage.  I like to begin by facilitating a discussion about transportation.  I ask the students to share how they travel from one place to another.  Then, I remind them that the Pilgrims traveled by ship.  I go on to explain that while that may be similar to how people travel in today's world, their experience was unlike any experience people today may have.

I read several pages from If You Sailed the Mayflower and the students practice their note taking skills.  At the end of the read aloud, I have the students share their notes and I compile them on a chart.  The students then use the chart to make a mini book about the voyage. The students write a sentence about the Mayflower/the voyage on each page. Clearly, we make a lot of mini books in my class.  ;)


I love making mini books because they get my students practicing their sentence writing skills without worrying about organizing an entire paragraph. 

When the mini books, are done, I like to have my students do some reading of their own. We are always practicing the skill of going back to the text to answer a question, and reading passages are a great way to sneak in more practice with that skill.  You can easily add some fun to this by letting your students use a highlighter to find their text evidence.


At some point during this portion of our unit, I always like to visit the Scholastic First Thanksgiving website. They have several amazing videos related to the Pilgrims and they really bring the content to life.  If you've never visited their First Thanksgiving site, do yourself a favor and go there now.  You won't regret it!

Before wrapping up our look into the Mayflower voyage, I like to ask my students to share the kinds of things they take when they travel.  Then, I ask them what kinds of things they take with them when they move (our town is very transient, so most of my students have experience with moving) to a new house (or town).  I use this conversation to point out that the Pilgrims were very limited in what they were allowed to bring with them when they moved to the New World.  I read a little more from If You Sailed on the Mayflower and then follow up with this activity.


Even though I start my unit with an introduction to the Pilgrims, I always return to this topic.  I like to take a look at life as a Pilgrim in Plymouth so that the students can do a little compare and contrast.  This National Geographic Pilgrims of Plymouth book is great!  It has great photos of people reenacting Pilgrim life, and it provides an overview of Pilgrim life.  I like to read it and then follow up with a graphic organizer that allows the students to record their take always from the reading.


Remember the Scholastic site I mentioned earlier in this post?  I usually visit it during this portion of our unit of study as they have some great videos about life in the Pilgrim village.  Definitely check out their videos!

After looking at Pilgrim life in general, I like to focus on what life was like for Pilgrim children.  The students always think it's interesting to learn about life as a kid in the past.  Once again, I like to use picture books to cover this content.  Sarah Morton's Day and Samuel Eaton's Day are great books to give students an inside look at a day in the life of Pilgrim kids.  The text is written in first person and is written in the vernacular of the day. 


After reading these books, it's time to compare and contrast our daily lives to that of Pilgrim kids.  This is always a successful activity.  The kids are always fascinated by the differences, and despite them being so drastically different, they are always able to identify the similarities.

Before moving on, I like to have my students write a paragraph about Pilgrim life.  It's a good way to give them more practice with informative writing and it gives me a good idea of what they have learned.


I always wrap our unit up by covering the First Thanksgiving.  I want my students to know why/how it was celebrated, and what kinds of food the Pilgrims ate.

A great book for explaining all of this is The Pilgrims' First Thanksgiving.  I usually take two days to read this book because it is long. On day one, we usually just talk about the text or do a stop and jot as I read. On day two, when we read about the First Thanksgiving, I have the students complete a circle map of important details. Then, they use that information to write about the First Thanksgiving.


Once we reach the end of the unit, I like to do this cumulative I Spy activity.  The students have to read the statement printed on the card and decide if it is true or false. It's a great way to get your students up and moving, and thinking critically. You could also use it as an assessment tool!


When/if time permits, I like to spend a bit of time covering Thanksgiving traditions, like the Macy's Day Parade.  Every year I am surprised at how many of my second graders have never heard of it, let alone watched it. 

There are lots of video options on You Tube, if you like the idea of showing them some actual parade footage.  Just be sure to watch whatever video you want to show before you actually show it.  It is You Tube, after all, who knows what might pop up.  Conde Nast has a short video that shows lots of different balloons from bird's eye view.  It's in fast motion (that's a thing, right?) but it still gives you a good look at the balloons.

After watching the video, I like to follow up with this reading passage.  It gives the students more information about the parade and gives them a chance to practice their text evidence skills.  And, if time permits, we might even complete the constructed response that goes with it.


You can grab this free reading passage by clicking HERE. :)

It also includes a passage about wild turkeys, another fun topic to cover when you're ready to expand your unit of study!  Use the link above to grab your freebie!


Many of the resources featured in this post can be found in my Thanksgiving unit on TPT.  It includes what you see here, and soooooo much more.  Check it out HERE.

https://www.teacherspayteachers.com/Product/Thanksgiving-389329

Looking for more reading passages?  My Nonfiction Close Reads Bundle is formatted just like the freebie above and is jam packed with nonfiction passages that will get you through the entire year! 


Thanks for stopping by today! 

DON'T FORGET IT, PIN IT!


Share It:

Estimation in the Primary Classroom

How often do you make an estimation?  Chances are, it's probably more often than you think.  We often estimate how much we're spending as we shop, we might guess how many people are in a room, we estimate the size of things, or how many items are on a shelf or in a box. Estimation is  a part of our daily lives, so why not start exposing your students to this skill?

How to Teach Estimation and Reasoning Skills

Not only is estimation a life skill, but it's fun! Kids love to make guesses and see how they did.  Even if their answers are way off, they always enjoy the process of guessing and checking.  Here's a peek at how I cover the skill of estimation in my second grade classroom.

While estimation can take many different forms, my philosophy is you have to start somewhere, so when I cover estimation, I like to work with a jar filled with objects.  It's a great tool for teaching and giving students practice with making reasonable guesses.  I bring the jar out every few weeks.  So, let's start with the jar.


As you can see, it's nothing fancy.  It came from Dollar Tree.  It's what you fill it with that makes it fancy and fun!  But more on that in a moment.


My jar is really a canister.  ;)  It isn't huge either.  It's a 32 ounce canister (quart) and it's plastic because sometimes I let the kids handle it and I don't want to worry about glass shattering all over the place.


I like to fill the jar with like sized objects.  But, I also like to expose my students to objects of varying sizes.  For example, one day we may estimate spider rings and the next time around, we might estimate marbles.  This gives the students practice with using their reasoning skills while they make educated guesses as to how many given objects are in the container. 

You can fill an estimation jar with just about anything!  Sometimes I buy cute little seasonal trinkets I see, and other times, I use what I have on hand.  In the past, I've sent the jar home with a different student each week and let them fill the jar.  I've even asked parents to send in items that could be used to fill the jar. 

Need some ideas for filling your estimation jar?  Here are a few you might like:


When it comes time to estimate, my students record their estimations in an estimation journal.  Before we estimate, I have the students fill in the basics like the date and the name of the object we are estimating, and we talk about making reasonable estimations.  I give a few examples and non-examples after I show them the objects outside of the jar.


I like to remove one object and show them what it looks like on its own. I walk from table group to table group so they can see this.  Then, I grab 10 of the objects and show them what that looks like.  As I walk from table group to table group, I talk about how seeing this amount can help them to make a reasonable guess if they take the time to think carefully.

As time goes by, I share the trick of roughly counting the number of objects in a row (they need to see the bottom of the jar to do this) and then using repeated addition to approximate the total.  For many, this skill is pretty advanced and often ignored, but it's a great way to reach all your learners and to encourage a new level of thinking/reasoning.


We spend some time talking about how our estimations are guesses, and that we might be wrong, and that's OK.  We also talk about making a guess that makes sense (is reasonable).  For example, it does not make sense to guess that there are 900 spider rings in a jar this size, but it might be reasonable guess that there are close to 100.


Then, it's time to estimate. I walk from table group to table group and show them the full jar, up close. I make sure each student has a chance to get a good look before moving on.

When my students are ready to record their estimation, I have them do so with a crayon. Crayon is hard to erase and is a more permanent means of recording their estimation.  Using crayon prevents them from erasing and changing their estimation if it is "wrong."  In the mind of many 7 year olds, if their guess doesn't match the actual amount, it's wrong.  I want them to understand that it's a guess and therefore doesn't need to be changed.  I remind them that if their guess was way off from the actual amount, it just means they need more practice with making estimations.


NOTE: When students make their estimations, they are usually pretty far off target in the beginning, and that's OK.  Over time, most of them get better at this skill.  Just remember, it's an exercise in reasoning and exposure to a skill.  I don't grade my students on this nor do I put any pressure on them. It's a fun way for us to practice a skill that will eventually translate into their everyday life.


Once everyone has had a chance to make their estimation, it's time to count up all the objects!  I leave this to the kids.  I place a tray at each table group and dump some of the objects from the jar onto the trays.  The students have to work together to figure out how many objects they have.  I teach them to group the objects into tens for quick and easy counting.


When the groups have figured out how many objects they have, one student reports the amount to me and I write it on the board.  Once all the totals are written on the board, we add them up to determine how many objects were in the jar.  This is a great way to expose them to adding multi-digit numbers.

Then, we talk about how close/far away our estimations were.

Finally, the students spend a few minutes drawing the contents of the estimation jar in their journal.


You can grab a copy of the journal HERE.  Simply copy as many blank student pages as desired and staple them together to create a journal for each student.  :)

The great thing about estimation is you can cover this skill as often as you want.  Any amount of practice is going to be beneficial, and it's always lots of fun for the kids.  Happy estimating!

DON'T FORGET IT, PIN IT!

How to Teach Estimation and Mathematical Reasoning


Share It: